
Table of Contents
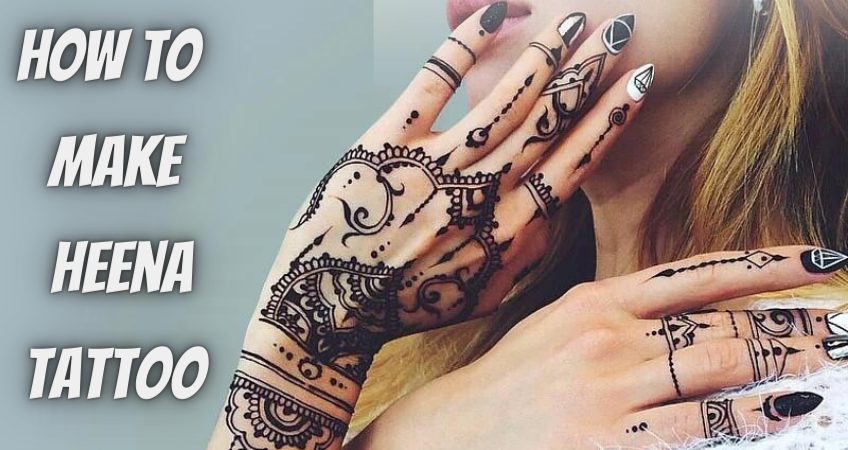
Henna Tattoo
Tattoos are sometimes a way to bring out our confidence or sometimes a way to carry along with us some deep indelible memories that we want to cherish for life. Besides the deep integrity behind getting inked, presently tattoos are being considered more of a fashion statement and not a trend. We see among us so many fashion enthusiasts who want to get a tattoo but the desire is not a lifetime. There is never a ‘no’ to a problem in the world of fashion. Along with being fashion trendy, people are concerned about their physical well-being as well. They don’t want to incur unnecessary harm to the body. The best available solution is to get temporary tattoos. Temporary tattoos are of many varieties, one such organic and natural way of getting a temporary tattoo is using henna, also known as ‘Mehendi. The origin of henna can be traced back to ancient times. The use of henna was prominent in the Central East and Eastern countries. Hennas are also a significant part of the culture and hold great value in various religious ceremonies and celebrations since ancient times and are carried forward to date.
Henna tattoos are growing in demand in almost every part of the world. Be it a maternity photoshoot or a prom date, henna tattoos are included in the celebration to raise the fashion remark. Originally, henna tattoos give a reddish-brown tint, now different ranges of henna tattoo colors are available.
Where can one get the henna tattoo done? There are two options available;
- Get a henna tattoo expert.
- DIY Henna Tattoo.
With the growing popularity of henna tattoos, many beauty salons have started providing the service. They employ experts with extensive knowledge about henna tattoo ideas and designs. They have excellent creative ideas to provide you with remarkable designs and also like the regular tattoo routine process, you can explain your designs and get the tattoo done accordingly.
You can take the help of the internet to find out the best salon that ink henna tattoos near you or look for freelance henna tattoo artists.
Another alternative option available is DIY Henna Tattoos. Preparing the henna tattoo needs a bit of hard work and patience if you are preparing from scratch but there are alternatives as well.
They are;
- Getting a ready-made Henna cone
- Using the Henna powder available in packets.
- Making it from the fresh leaves.
- Using a Henna sticker or body paint kit.
1. Getting a ready-made Henna cone
We are all used to getting things done at ease. Similarly, if you want to get a Henna tattoo on your own without investing any time in its preparation, the best option is to get a ready-made henna cone and apply it accordingly as per your desired design.
But it is always advisable to buy Henna cones from trusted brands. It helps you ensure that no other impurities are used in the cones.
The procedure to use it is very simple. One just needs to cut the tip of the cone according to the thickness they want and apply it accordingly. A patch check before applying it directly to the skin is advisable.
One can easily find it online as well. Some of the best ready-made henna cones available are;
- Zenia 6 Pack 100% Natural Ready to Use Henna Paste Hair Color Hair Dye Cones Reddish Brown Color
- SaVvam 12Pack Ready to Use Henna Paste Hair Color & Hair Dye Cones
- Temporary Tattoo India Painting Tattoo Paste Cone, 3 Tubes Brown Paste Cone Indian Body Art Painting Drawing (Brown, 3 Cones)
- Heena Cone Indian Traditional 24 Kaveri Henna Mehndi Cone Natural Herbal Temporary Tattoo Body Paint Mehendi Cone 100% Natural (2Box)
2. Using the Henna powder available in packets.
The other alternative to making a Henna tattoo on your own is to use the Henna powder and make it a paste. Henna powder is generally dry henna leaves crushed to its powder form. One can easily find it in supermarkets or beauty shops.
The procedure used to make the Henna paste using powder is very simple.
- Take the Powder in a bowl, preferably a glass bowl.
- Apply water or tea liquor in moderation to make a fine paste. Tea liquor gives a deeper color to the stain.
- Put it in a cone and use it accordingly for your design.
Some of the best henna powders available online are;
- EcoVica 100% Natural and Pure Mehndi | Henna Powder | Lawsonia Inermis 200 Gm (0.4 LB) 7 Ounces | Colors Hair Natural Orange-Red Hair | Comes With Brush, Showercap & Gloves For Easy Application
- Jamila 100% Pure & Natural Henna Powder Triple Sifted, 250 grams
Tattoo Kit for Beginners by Price
3. Making it from the fresh leaves
This is the most organic option. Not only are henna leaves used to make temporary tattoos, but also they are the powerhouse of many medicinal properties. In ancient times, Henna tattoos were used for better skin, nails, and other internal benefits.
You are lucky enough to get the fresh leaves of henna, bring the leaves, wash them thoroughly, and make a smooth paste with it. Put it in cones and store it in the refrigerator. The perishable quality of the Henna leaves is less. So, one can store the paste for a long time.
4. Using a Henna sticker or body paint kit
This is one of the easiest and less time-consuming options available regarding Henna temporary tattoos. This is one of the most ideal options for beginners, do not have many ideas regarding designs and how to draw them with the paste. You just need to take the sticker and paste it on the body. There are also stencils available, which make your DIY henna application easy and fun.
Various henna stickers or body paint kits available online are;
- Adecco LLC Henna Tattoo, 6 Sheets Henna Stickers, Waterproof Red Henna Tattoo Stickers for Women
- JOEHAPY 28 Sheets Sexy Lace Black Henna Temporary Tattoos For Women Adult Girl Mandala Flower Indian Tribal Lotus Fake Jewelry Butterfly Feather Tattoo Sticker Skull Dreamcatcher Tattoo For Chest Neck
- 12 Pieces/Lot 3D Black Henna Rose Flower Temporary Tattoo Stickers Cover Women Custom Tattoos Blossom DIY Sexy Fake Waterproof Tattoos Paste 10x6CM
After the basic ingredients, one needs to have a few essentials when making a DIY Henna like;
- A good quality cone or kit for application:
Cones are necessary for the smooth application of henna. A good quality cone is necessary to prevent any leakage, that would mess up the process otherwise. The better the cone quality, the better is the application. Some of the good quality cones available online are;
- Empty henna cones Hand Rolled Cellophane Cones for henna or Jagua Applicators Dispenser for Henna, Jagua, and Cake Decorating Art Craft 6 Pack.
- 2Pcs Jagua Henna Temporary Tattoo Kit Applicator Bottles with 16 Tips Needles for Henna Tattoo Cone Tattoo Bottle Kits – Qty 2 & 16 Tips
- Stamps for beginners:
Even if you have no idea about the henna application, some stencils can help draw the perfect design. Some of the good quality stencils available online are;
- Artistic Motif Round and Mandala Block Print Wood Stamps (Set of 5)
- Henna Print Stamps Attractive Small Floral Leaf Shape Wooden Blocks (Set of 10)
- A solution that can help deepen the colour
There are many oils available that can brighten up the temporary henna tattoo and make it look more vibrant. One of the best DIY solutions to make your henna tattoo darker is using sugar syrup. You can dip a cotton ball into the syrup and lightly dab it onto the dried henna on your hand. Use it twice.
Tips to take care of the henna tattoo during and after application:
- Clean your hands thoroughly with soap and water before application.
- Apply the design as per your convenience, the freehand style on using a stamp.
- Leave it to dry for 2 to 3 hours.
- Apply the sugar syrup to make your Henna tattoo darker.
- Once it dries out, remove the dried henna. Do not use water, as it would wash away the colours that have not yet been soaked into the skin.
- After the dried henna is taken off, using oil, especially mustard oil, where the tattoo is done will make the henna tattoo shine.
- One should not use any soap and water for the first 12 to 24 hours to get the maximum henna stain.
Precautions to be taken when applying Henna:
If you are using the Henna for the first time, a patch test is a must. Put a small amount of henna on your inner wrist, and wait for any reactions. If there is no such redness or itching in the first 24 hours, you can use it to make your tattoo.
If there is any redness, patches, or itching after applying the Henna, wash it off with soap and water and apply a moisturizing lotion over it. If irritability prevails for a longer period it is best to visit a physician.
Always make sure that you are using a good quality Henna product. There are many products available that use chemicals to darken the Henna colour, which can in turn harm the skin.
How to Make Henna Tattoo
| Steps | Description |
|---|---|
| Step 1: Prepare the henna paste | Mix henna powder, lemon juice, sugar, and essential oils in a bowl. Stir well until you achieve a smooth, thick paste. Cover the bowl and let the paste sit for a few hours or overnight to allow the dye to release and the paste to darken. |
| Step 2: Clean and prepare the skin | Gently wash the area where you want to apply the henna tattoo. Ensure it is clean, dry, and free from any lotions or oils that may interfere with the henna’s adherence. |
| Step 3: Design and apply the henna | Using a cone or applicator bottle, carefully draw your desired design on the skin. Start with simple shapes and patterns and gradually build up more intricate details. Allow the henna to dry on the skin for a minimum of 1-2 hours. |
| Step 4: Seal and protect the henna | Apply a mixture of lemon juice and sugar on the dried henna to seal it and prevent smudging. Leave it on for a while before gently wrapping the henna with tissue or medical tape to protect it while it sets. |
| Step 5: Wait and remove the dried henna | Allow the henna to set on the skin for at least 4-6 hours or overnight. Avoid contact with water during this time. Once the henna is completely dry, gently scrape off the dried paste and avoid scrubbing the area excessively. |
| Step 6: Moisturize and maintain the design | Apply a natural oil, such as coconut or olive oil, to the henna design to keep it moisturized and help the color deepen. Avoid excessive exposure to water and scrubbing to ensure the design lasts as long as possible. |
End Note:
Using DIY henna tattoo, for your temporary tattoo needs is the best and healthy alternative compared to temporary stickers or tattoo inks. You can get a variety of henna tattoo designs, and henna tattoo ideas on the internet. Follow the tattoo care tips, and enjoy the healthy homemade henna tattoo.
FAQ’s
What materials do I need to make a henna tattoo?
To create a henna tattoo, you’ll need henna powder, lemon juice or water, a mixing bowl, a spoon, a plastic cone or piping bag, tissue paper, and essential oils (e.g., lavender, eucalyptus) for sealing the design.
How do I make henna paste?
To make henna paste, mix henna powder with lemon juice or water in a bowl until you achieve a thick, smooth consistency. Let the mixture sit for 1-2 hours to allow the dye to release. Stir it occasionally during this time.
How do I prepare my skin for a henna tattoo?
Ensure your skin is clean and free from oils or lotions. If needed, lightly exfoliate the area to remove dead skin cells, allowing the henna to adhere better. You can apply a thin layer of eucalyptus oil to create a barrier between the skin and henna for easier removal later.
How do I apply henna paste?
Fill a plastic cone or piping bag with the henna paste. Gently squeeze the cone to create a thin, controlled flow. Start by outlining your desired design, and then fill it in with more intricate patterns. Be patient and steady while applying.
How long should I let the henna tattoo dry?
Allow the henna tattoo to dry completely, which typically takes around 15-30 minutes. Avoid touching or smudging the design during this time.
How long should I keep the henna paste on my skin?
Leave the henna paste on your skin for at least 4-6 hours or overnight if possible. The longer it stays on, the darker and longer-lasting the stain will be. Avoid contact with water while the paste is on your skin.